A Guide To Repairing Cracks in Coastal Homes
Living by the coast is a dream, but it also brings unique challenges for your home. Salt air, intense sun, and constant humidity create the perfect conditions for cracks to form and spread.
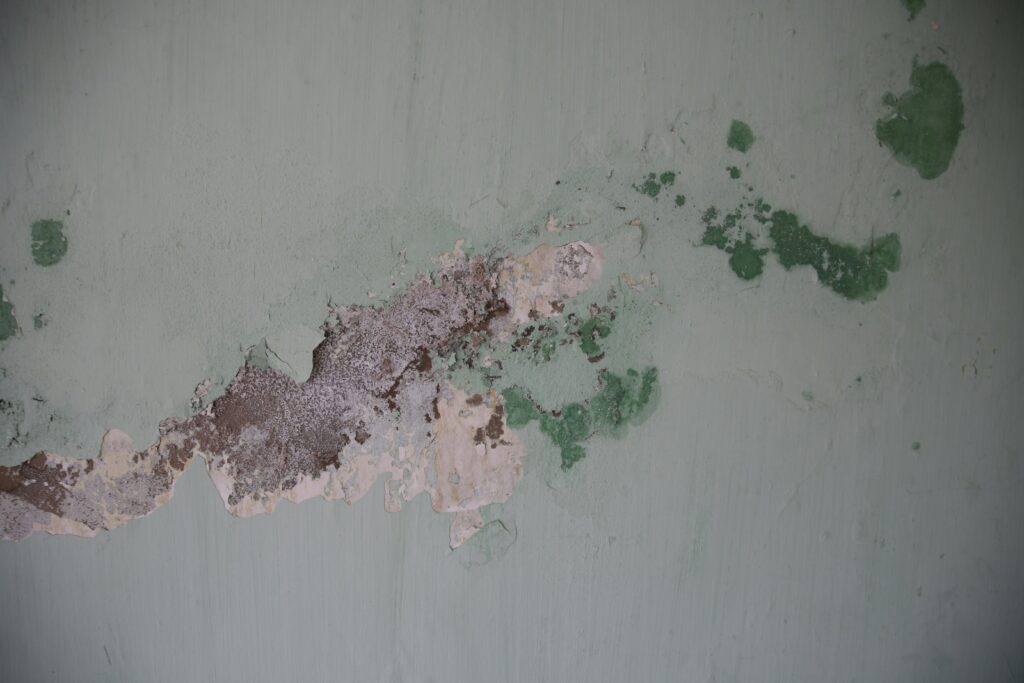
Without proper prep, these blemishes become gateways for moisture, salt, and further damage. Simply painting over them often leads to disappointment. Soon enough, homeowners are asking: why is the paint on my walls cracking?
Repairing cracks correctly is the key to a long-lasting finish. In this guide, we’ll show you why coastal homes need extra care, how to choose the right materials, and what steps make your paint last.
Coastal Reality Check: Repairing Cracks and Understanding Why They Spread Faster in a Building
The coastal environment is harsher than most. The interplay of salt, humidity, sun, and thermal shift accelerates degradation of paint and substrates.
When repairing cracks, it’s crucial to use the right materials and techniques to ensure the crack is properly filled and leveled. Make sure the crack is completely filled before moving on to finishing, as this prevents future issues and ensures a solid repair.
The goal is to achieve a finish that not only restores structural integrity but also looks natural, so your repair blends seamlessly with the surrounding surface.
Proper blending techniques help visually integrate the repair, making it less noticeable and maintaining the appearance of the original concrete.
Why Cracks in a Building Spread Faster?
When it comes to repairing cracks in walls and concrete, having the right approach and materials is essential for achieving a smooth, long-lasting finish.

Cracks can develop for many reasons—settling, structural movement, or everyday wear and tear—and if left untreated, even small cracks can become more noticeable and lead to bigger issues down the line.
Whether you’re fixing a hairline crack in your living room wall or tackling a larger crack in a concrete surface, the right preparation and technique make all the difference. In this guide, you’ll find practical tips for preparing the surface, filling the crack, and finishing with paint so your repair blends seamlessly.
No matter the size of the job, these steps will help you restore your walls and concrete to their best condition, making repairs less stressful and more effective.
Salt corrosion
Salt-laden air can corrode paint films and underlying substrates over time. Studies show that in severe salt-spray zones, exterior coatings may begin noticeable deterioration in as little as two years if not properly formulated or applied.
Accelerated breakdown
Salt particles act as abrasive media and draw moisture, weakening adhesion of paint layers.
UV and fading
Intense sunlight in coastal zones breaks down pigment and binder molecules, leading to chalking (a powdery surface residue) and fading.
Salt crystallization pressure
In porous substrates (e.g. masonry, stucco), salt migrating inward can crystallize, exerting micro-pressures that widen cracks over time.
Because of all these factors, cracks and surface damage must be addressed promptly—leaving them to widen under coastal stress only makes repair more complicated.
Industry research confirms that cracks in a building exposed to salt air deteriorate much faster than inland structures.
Diagnose First: Types of Cracks and What They Mean
Understanding crack types helps you pick the right repair strategy. Before repairing any cracked surfaces, it’s important to assess whether the material is still structurally sound to ensure effective and lasting results.
Hairline Cracks
Thin surface cracks may look harmless, but in coastal zones they trap salt and moisture. Repairing deep cracks at this stage prevents costly repairs later.
Substrate Cracks
When cracks run into plaster or stucco, they signal deeper stress. Ignoring them makes repairing concrete cracks harder and shortens the life of any paint job.
Ceiling Cracks
Humidity often causes plaster ceilings to fail. A single plaster ceiling crack repair can stop widespread peeling.
Paint Film Cracks
Sometimes the issue lies in the paint itself. If spray paint is cracking when drying, it’s often due to humidity, poor prep, or improper layering. This is a sign that repairing deep cracks requires both surface prep and better materials.
Deep Cracks
Deep cracks require a bit more attention and care to ensure a lasting repair. Start by removing any loose material or debris from the crack using a putty knife or a stiff brush—this step is crucial for helping the filler stick to the surface.
Once the crack is clean, fill it with a suitable compound, such as joint compound for interior walls or a concrete patch for exterior surfaces. For larger cracks, it’s often best to fill the gap in layers, allowing each layer to dry completely before adding the next.
If the crack is especially deep, you may need to use sand or a backer rod to fill the bottom of the gap before applying the filler. This helps the compound hold its shape and ensures a solid repair.
After the final layer is dry, sand the surface smooth so it blends in with the surrounding area. Taking the time to properly clean, fill, and layer your repair will make a big difference in both appearance and durability.
Moisture & Salt Diagnostics
Before jumping into patching, you must ensure your substrate is ready—especially in coastal zones. The diagnostic steps may vary depending on the type of substrate or crack.
Interior humidity monitoring
- Coastal homes often retain high relative humidity (RH). Aim to keep it around 45–55% during paint/repair phases so materials don’t stay saturated.
- Excess RH weakens adhesion and prolongs drying, especially near sea spray zones.
Plastic-sheet moisture test (for masonry/stucco)
- Tape a clear plastic sheet to the surface; if condensation appears underneath in 24 hours, moisture is still migrating out. Leave the plastic sheet in place for the full 24 hours to ensure accurate results.
- This test is frequently recommended to detect latent moisture before coating.
Salt contamination testing (Bresle method)
- On metal or masonry surfaces, residual salts can undermine adhesion by attracting moisture under the coating.
- The Bresle method measures soluble salt concentration (e.g. sodium chloride) on a surface just prior to coating. Values above ~50 mg/m² are often deemed excessive by coating specifications.
- Washing surfaces with deionized water and brushing can help remove embedded salts.
Surface cleaning and de-chalking
- Use low-pressure rinse and mild detergent (or proprietary cleaners) to remove chalking paint, salt deposits, and debris and let it completely dry.
- If cracks are present, carefully open them up to test for hidden moisture or salt before proceeding.
These diagnostic steps protect repair work from being undermined by hidden moisture or salt.
Preparation: Preventing “Why Is the Paint on My Walls Cracking”
Good prep is half the battle when repairing the cracks.
- Wash surfaces to remove salt, chalk, and grime. After washing, wipe the surface clean to remove any remaining moisture or residue.
- Scrape flaking paint until you reach solid material. Be sure to remove any loose stuff or debris from cracks before proceeding.
- Sand edges smooth for an even finish. For best results, sand or feather the edges in one direction, following the same direction as the surface texture.
- Spot-prime before applying fillers.
Poor preparation leads directly to complaints like spray paint is cracking when drying. Taking extra time now means fewer callbacks later.
Step-by-Step: Repairing Cracks Before Painting
Here’s a more detailed, evidence-informed playbook for each major cracked surface scenario. Depending on the depth or type of crack, the repair steps may vary, so always assess the situation before proceeding.
- Clean the area thoroughly to remove dust and debris from the crack. This ensures the repair material will adhere properly and prevents issues from happening later in the process.
- For deep cracks, press the filler or patching compound firmly into the crack to ensure it is completely filled. The filler should be hard enough to hold its shape—not too soft or runny—for a smooth, durable finish.
- After applying each layer of filler, allow it to dry completely and then sanded it smooth before applying the next layer. This helps each layer bond well and creates a seamless repair.
- Once the crack is filled and sanded, feather the edges of the repair outward to blend it into the surrounding surface. This technique helps the repair transition smoothly and improves the visual appearance.
- Match the texture of the repaired area to the surrounding surface using appropriate tools or techniques. Achieving a consistent texture is key to making the repair less noticeable.
- In wall and ceiling repairs, pay special attention to corners and the corner where walls meet ceilings. Reinforce these areas with joint tape or fiber mesh tape to prevent future cracking, as corners are prone to stress and movement.
- Leave the repair to dry for the recommended time before painting or applying any finish. Proper drying ensures the repair is strong and long-lasting.
- If you notice cracks continue to appear after repairs, it may indicate ongoing moisture or structural issues that need to be addressed to prevent further damage.
- When choosing repair materials, remember that the cheapest solution may not be the most durable. Compare different repair solutions like caulk, joint compound, or spackle to find the best fit for your needs.
- In plaster repair, be aware that old plaster may pop or crack as it deteriorates. Proper filling and reinforcement can help prevent further popping or damage.
- As you finish, blend the repaired area into the surrounding surface for a seamless look.
By following these steps and ensuring each crack is completely filled, sanded, feathered, and blended, you’ll achieve a durable and visually appealing repair.
Sealants, Primers & Paints That Last in Coastal Zones
Selecting proper materials is key to durability in salty, sunny, humid environments.
- Flexible sealants: Must accommodate movement. For example, DAP’s EXTREME STRETCH acrylic urethane sealant can stretch over 600% and is paintable after cure. When choosing a repair solution for cracks and gaps, compare options like caulk, joint compound, and spackle to find the best fit for your needs.
- Elastomeric or crack-bridging coatings: These coatings are engineered to flex with substrate motion, bridging micro-cracks. Sikagard 550W is one example. Certain products can enhance the durability of repairs by providing long-lasting flexibility and protection.
- Primer selection: Use alkali-resistant primers on masonry and stain-blocking primers on interior surfaces to resist migration of salts or tannins.
- Topcoats: Choose marine-grade, UV-resistant, mildew-resistant paints formulated for high-salt environments. These coatings boast higher durability under stress than standard paints.
- Eco-friendly paint options: While eco-friendly paints exist, ensure they’re rated for coastal durability—some formulations may trade off performance for sustainability.
Note that the cheapest products may not offer the best long-term results, as lower-cost solutions can require more frequent repairs.
When you pair flexible products, proper primers, and a coating engineered for coastal conditions, cracks are far less likely to return.
Application Rules in Humid, Salty Air
Even great materials can fail if applied incorrectly in coastal conditions.
- Avoid direct sun or hot surfaces: Painting in bright sun can cause the paint’s surface to skin over too fast, trapping solvents and leading to cracking.
- Respect recoat windows and cure times: In high humidity, allow extra time between coats to ensure full curing. Always leave paint or filler to dry for the recommended period before applying additional coats or finishing.
- Ensure total cleanliness: Any trace of salt, oil, or debris ruins adhesion.
- Control ambient conditions: Use fans, dehumidifiers, or schedule work in drier hours.
- Maintain wet edges during application to avoid overlap marks or seam irregularities.
- Apply paint or filler in a consistent direction to help feather edges and achieve a seamless finish.
When homeowners skip these rules, they soon find themselves searching: why is the paint on my walls cracking?
Paint Aftercare in Coastal Zones
Once your paint is down, you’ll want to maintain it to delay deterioration.
- Routine washing: Rinse exteriors every 6 to 12 months to remove accumulated salt and chalk before it damages the finish. Do it more frequently if your home sits within heavy salt-spray zones. Several coastal painting blogs recommend this as a proactive defense.
- Inspect cracks early: As soon as you see fine lines or hairlines, re-seal before they worsen.
- Touch-ups: Spot-fix small areas before they expand, using the same system (primer, flexible topcoat).
- Recoat schedule: Expect to refresh full surfaces every 5–7 years (or sooner in harsher microclimates).
Cracking during drying often results from poor prep, excess humidity, or improper layering of paint
Tools & Materials Checklist
Professional kits for cracks repairing includes:
- Scraper, putty knife, rasps
- Sandpaper (various grits)
- Joint compound, patching plaster
- Flexible elasto-sealants (polyurethane, acrylic urethane)
- Mesh or reinforcing tape
- Alkali-resistant primers
- High-durability, UV-stable exterior paints
- Moisture meter or hygrometer
- Plastic sheet test materials
- Soft brushes, low-pressure wash tools
Having the right tools keeps every repairing project smooth and effective.
Common Mistakes to Avoid
When repairing cracks, avoiding a few common mistakes can make the difference between a smooth, invisible repair and a patch that stands out.

One frequent mistake is skipping the cleaning step, leaving dust, debris, or old filler in the crack can prevent the new filler from bonding properly to the surface, causing the crack to reappear. Another issue is not allowing the filler to dry completely before sanding or painting; this can lead to shrinkage, uneven surfaces, or a repair that’s still noticeable after painting.
Using the wrong type of filler or caulk for the job can also cause problems, as some products may not provide enough support or flexibility for the area you’re repairing.
To achieve the best results, always remove all dust and debris, choose the right filler or caulk for your surface, and follow the manufacturer’s instructions for drying times. Taking these extra steps will help ensure your repairs are smooth, durable, and virtually invisible, leaving your walls and concrete looking their best for years to come.
When to Call a Professional
Not every crack repair should be a DIY project. Consider calling Pro-Vision Painting if:
- Cracks are wide, deep, or recurring
- You detect active leaks or water intrusion
- There is extensive peeling, flaking, or alligatoring on the exterior
- Ceiling or structural cracks spread rapidly
- You see salt damage or efflorescence in masonry
- The home sits in the hardest salt-spray zones (i.e., < 200 ft from shoreline)
A pro can evaluate whether structural underpinning or more in-depth moisture mitigation is needed beyond cosmetic fixes.
The guidance provided in this article is intended for general informational purposes and should not replace a professional assessment when dealing with complex or severe issues.
Conclusion
Cracks may be inevitable in coastal settings, but they don’t have to be a long-term liability. At Pro-Vision Painting, we help homeowners from Jacksonville Beach to St Augustine avoid the frustrations of why is the paint on my walls cracking.
If your walls are ready for care, let’s make sure your next paint job doesn’t just look beautiful—it lasts.
We hope this guide has been helpful and encourage you to learn more about repairing cracks and home maintenance to keep your space in top shape.


